This page shows you all the details about the lookup table. It can be accessed from the lookup tables list screen.
The page contains the following tabs.
This tab allows you to view and edit content of the lookup table.
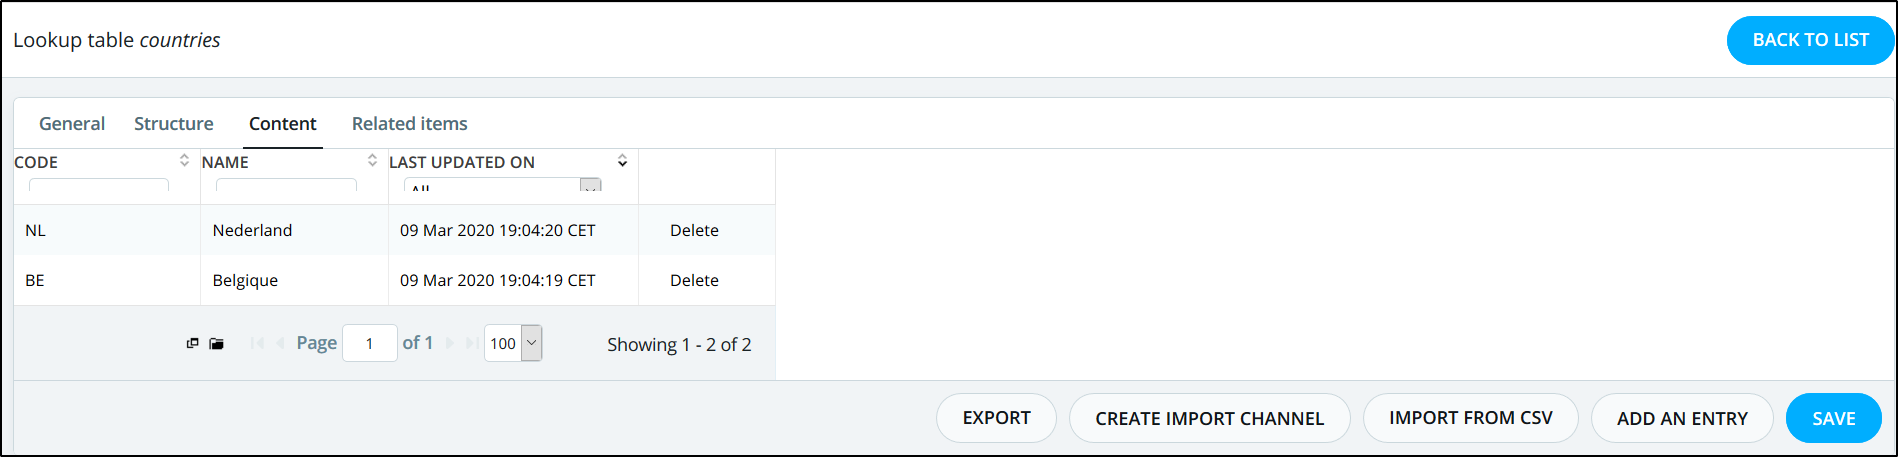
- To update the value of a cell, just click on it. The cell will become editable, and you will be able to change the value.
- To add new rows, click on Add an entry. A new row will be added at the bottom of the table. You can then complete the values by updating each cell.
- To delete rows, click on Delete at the right of the line. The row will be removed from the table.
Don't forget to Save after applying the needed changes.
The " Import data from CSV " action button allows you to import the lookup table data directly from a CSV file without having to create a channel. See Automatic Population of Lookup table from CSV
The Create data import channel action button allows you to create a channel to import data in the lookup table from an outside data source in an automatic way.
The Export data action button allows you to export existing lookup table data in CSV format.
Note: When exporting the lookup table which has more than 100000 lines (for example this lookup table has 200000 lines), the export button will only export the first 100000 lines in the lookup table.
Note: If you have a lookup table with a huge number of rows, it is theoretically impossible to delete all rows of this lookup table by using the normal delete button next to each row. It would take a lot of time to delete all rows. Therefore, we can delete all the data in the lookup table in one shot by following the below steps.
1- From the Lookup table, go to the "Content" page and click on "Import data from CSV".

2- Now upload the CSV file and make sure that Append is disabled. Then click on the "Import" button.
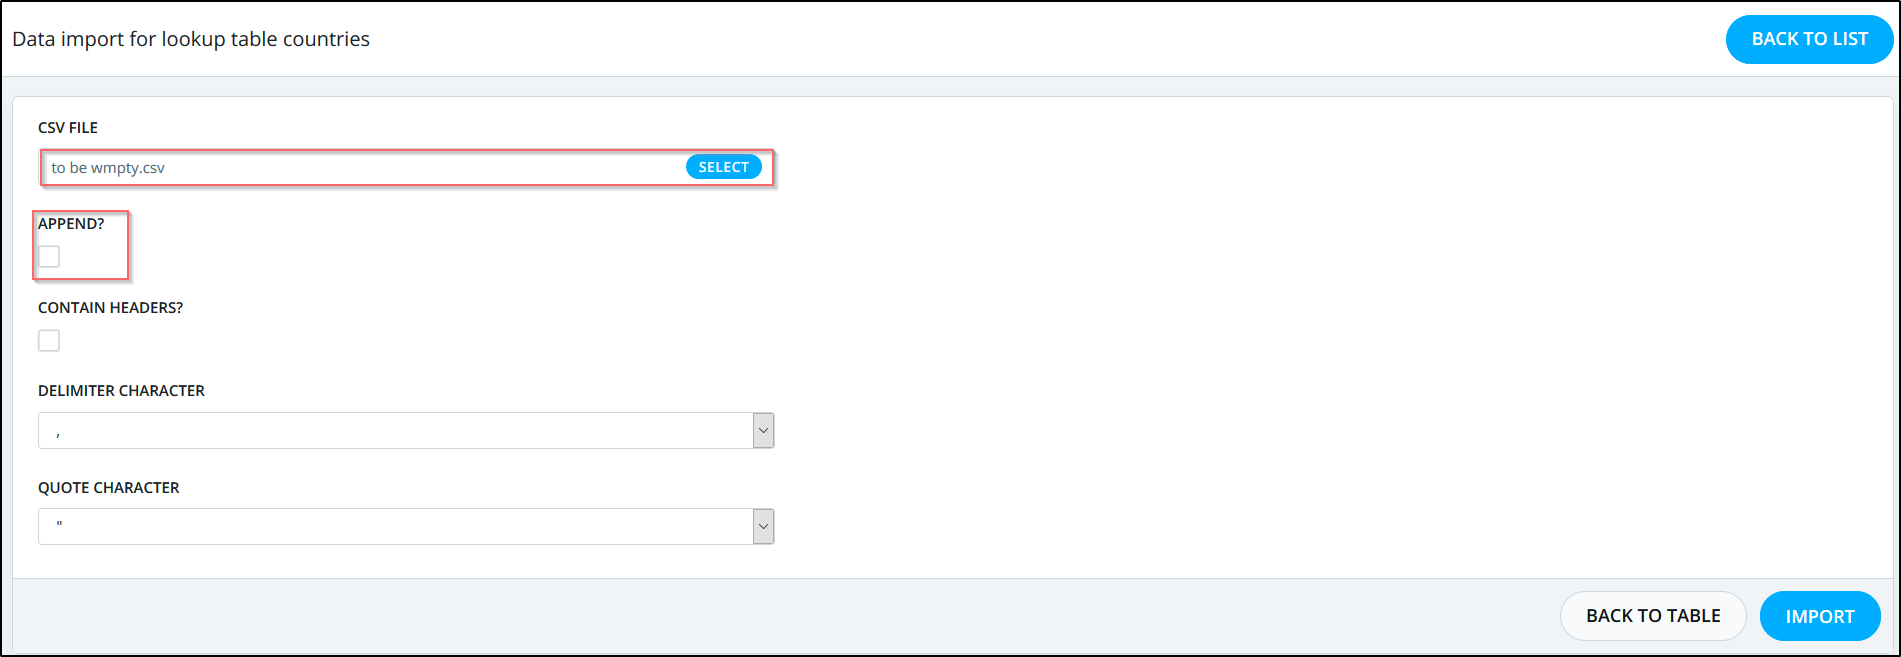
Note: Below is a sample from the CSV file that we have used.
,,,,,,,,,,
3- The lookup table will now have one record in it. You will need to delete it manually by pressing the delete button and then saving the lookup table.
